gcloud config set project ggn-nmfs-pamdata-prod-1 PAM Windows Workstation
Note
All workstations will be restarted on the 15th of every month at 6:00pm (Hawaii), 8-9PM (PST) 11pm-12AM (EST) for required patching and updates. Please plan your processing accordingly. Each pam-ww can be turned on/off in IAP desktop (see Remote Desktop Connections instructions below).
What are PAM Windows Workstations?
PAM Windows Workstations (pam-ww) are designed specifically for running interactive software or software that is not available for batch processing in the cloud. They provide a familiar desktop environment tailored for cloud processing and data validation.
To request a pam-ww instance, submit a new issue here in this github repo and select the “Request a pam-ww” template. If the previous link does not work for you, please submit this form instead. The cloud team will be notified of your request and will email you or comment on the issue when the pam-ww is ready for use.
What is included in a PAM Windows Workstation?
The pam-ww comes pre-configured with specializations tailored for passive acoustic monitoring workflows, specifically focused on Google Cloud Storage bucket mounts and PAM software.
Hardware
The Windows workstation by default has 8 vCPU cores, 32 GB of RAM, and a 150 GB HDD. As funding allows, increases to these allocations are allowed.
Cloud Data Mounts
NMFS passive acoustic data in the cloud is available through the pam-ww with broad read-level access.
Default Mounts:
Available via the desktop shortcut “Mounted_Acoustic_Data”. These are read-only and do not cache. This is ideal for processing-heavy and hands-off workflows where local disk space should not be consumed for caching.
User Mounts & Read-Ahead Tool:
For cases requiring write access and/or interactive caching. User mounts default to the default credentials, so if you configure default credentials as your end user this can enable writing if you have suffecient permissions to the GCS bucket.
User mounts can be configured with a read-ahead cache to prepopulate data for highly interactive purposes (e.g., detection review). Be aware of your cache size! Caching will consume your C: drive space. Be mindful of your disk limits to prevent locking yourself out of your pam-ww.
See below section “Configuring user mounts and read-head cache tool” for more info.
Included and Supported Software
Included software:
- Raven Pro (need to associate your own license)
- Rstudio
- Github desktop
- Manta
- Libre Office
- PACE
- PAMguard
- SoundScope
- notepad++
- FLAC libraries
- Compiled Triton
- RavenX
- Soundtrap utilities
- Drive for Desktop (note: NMFS org is currently blocking use in this environment. We are working on it)
- Fpod.exe
Software that requires users to self-service installs
- Anaconda (not open source)
- MATLAB (not open source) (choose your preferred version)
- R / python (choose your preferred version)
Access and Connection Instructions
Remote Desktop Connection
Option 1: Using IAP Desktop (Recommended)
IAP Desktop is optional open-source software and is not on every approved list. Please use it only as allowed by your local IT software installation policies.
Install and Setup: Download the installer from the IAP Desktop GitHub website and install it on your computer.
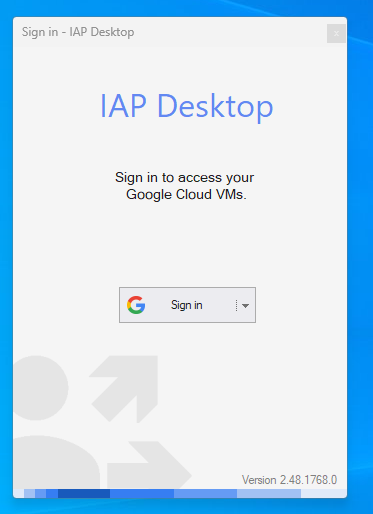
Sign In: Open IAP Desktop and click “Sign In with Google”. Use the same email address associated with your PAM project access.
Locate your Workstation: Once logged in, look at the Project Explorer panel on the left. Expand the project tree until you see your workstation name (e.g.,
firstname-lastname-pam-ww).
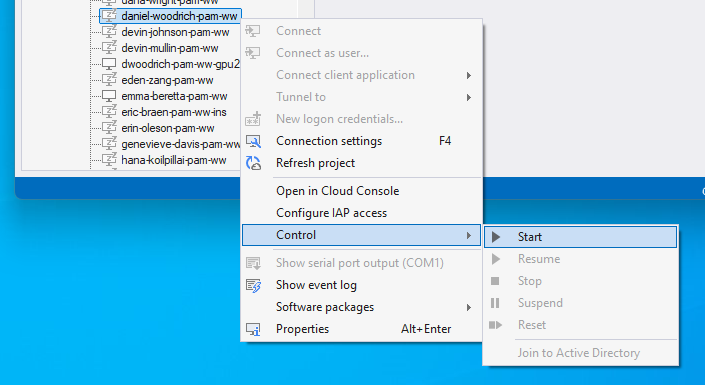
Start Your Workstation: You can control the power state of your workstation directly from this list:
To Start: Right-click your instance name and select Start. Wait for the “Z” to go away in the instance icon, or refresh.
To Stop: When finished working, right-click the instance and select Stop to save resources.
- Connect
Right-click on your instance name and select “Connect as User”. IAP Desktop will automatically handle the secure connection.
log in as user:
- User: Enter
pam_user, Password: Leave blank (do not supply a password), click OK.
log in as admin:
- First, right click on the your workstation and select the option ‘new logon credentials’.
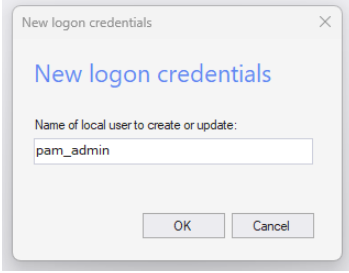
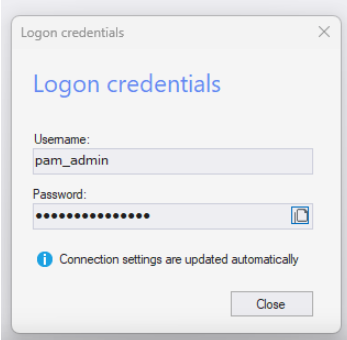
- User: Enter
pam_admin, Password: provide the generated password, click OK.
We recommend and prefer you keep use consistent with these built-in accounts.
- Subsequent connections
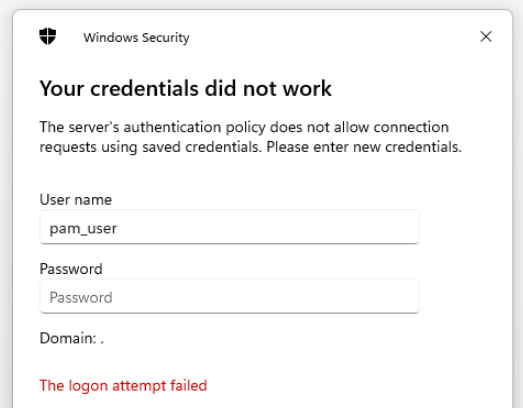
Continue to use the “Connect as User” option to be more intentional about whether you are logging in as the pam_user or pam_admin account. There is a security rule on the instance that will prevent stored logins, so you may see what appears to be an error on the first log in attempt but it will work the second time.
Option 2: Command Line Interface
If you are unable to use IAP Desktop or prefer not to, you may continue using the gcloud command line method.
Required dependency: Google Cloud SDK
To connect in this style, you will need to install the gcloud Command Line Interface on your personal computer:
To connect to a remote workstation, you have to install software on your primary physical computer. The next steps in this section assume you’re using Windows, alternatives exist for Mac and Linux.
Install Google Cloud SDK on your primary physical computer. In the section titled “Installing the latest gcloud CLI version”, select your personal computer operating system, click “Google Cloud CLI Installer” and follow the steps to configure the client software. See the image below for comparison. Once Cloud SDK is installed, a gcloud terminal window might open. You can close this terminal.

Open the Windows Command Prompt (aka “terminal”) and enter “gcloud auth login”. This will take you to a browser to login with your email password or two-step verification to configure your user credential with gcloud. This step can completed using shells on other operating systems as long as they work with gcloud.
If prompted to set a project, enter the following code chunk:
To confirm authentication was successful, enter ‘gcloud auth list’ in the terminal and check that it returns your NOAA email address.
Once you have confirmed the gcloud auth login was successful, you can close the Windows terminal and move on to the connect steps to access your pam-ww.
To Connect:
Once your pam-ww instance is running (checked via the console page) or in IAP desktop, follow these steps to connect via Windows Command Prompt.
Open Command Prompt: Open the Windows Command Prompt (cmd.exe).
Run the Connection Command: Copy the code below, replacing
firstname-lastname-pam-wwwith your specific workstation name.
start gcloud compute start-iap-tunnel firstname-lastname-pam-ww 3389 --local-host-port=localhost:3390 --zone=us-east4-c --project=ggn-nmfs-pamdata-prod-1 && timeout 8 && mstsc /v:localhost:3390Example for user rebecca.vanhoeck@noaa.gov:
start gcloud compute start-iap-tunnel rebecca-vanhoeck-pam-ww 3389 --local-host-port=localhost:3390 --zone=us-east4-c --project=ggn-nmfs-pamdata-prod-1 && timeout 8 && mstsc /v:localhost:3390- Log In: A new terminal window will open to establish the tunnel, followed by the Remote Desktop (RDP) popup. Use the same login in patterns as suggested for IAP desktop if logging in as admin is needed.
gcloud compute reset-windows-password rebecca-vanhoeck-pam-ww --zone=us-east4-c --project=ggn-nmfs-pamdata-prod-1 --user pam_admin
Note
Troubleshooting:
Firewall: If a Windows firewall popup appears, select Cancel.
Wrong Account: If prompted for a personal NOAA account, select “More choices” -> “Use a different account” and enter
pam_userorpam_admin.Connection Errors: If the RDP fails to connect, ensure your instance has a green checkmark on the console page or no “Z” on icon in IAP desktop, close the windows, and try Step 2 again.
Support Model
The pam-ww operates on a self-service support model. You are empowered to manage and customize your workstation. Our team is available for help and escalation of issues you cannot or don’t feel comfortable solving yourself.
OS-Level Control
You have full control over your instance. You can reset the password of a local account, including admin accounts.
How to admin elevate
You can admin elevate one of a few ways. No matter what, you need an admin password, and you should use the built in account pam_admin for elevation tasks.
In IAP desktop, right click on the your workstation and select the option ‘new logon credentials’.
You can copy this password and paste it in to elevate if logged in as pam_user, or use this to log in as pam_admin for extended admin tasks. Please generate new admin password only as needed each session, and don’t save them.
Equivalent gcloud example for user rebecca.vanhoeck@noaa.gov:
gcloud compute reset-windows-password rebecca-vanhoeck-pam-ww --zone=us-east4-c --project=ggn-nmfs-pamdata-prod-1 --user pam_adminWhat we encourage you to do:
- Daily Operations: Continue to use the built-in pam_user account for standard, daily use.
- Occasional Admin Needs: If you need to elevate privileges occasionally (like for software installs), generate a password for the pam_admin account and paste it in within your pam_user session.
- Frequent Admin Needs: If you anticipate a high need for admin elevation over a short period, log into the pam-ww as pam_admin so you can push consent prompts instead of typing a password repeatedly.
- Leave system security intact: Change security rules on the instance minimally as a last resort to solve specific, blocking software issues. We expect you to keep us informed of any such fixes. We audit and track compliance whether or not you keep us in the loop and we will follow up as necessary.
What we strongly discourage:
- Downloading potentially unsafe software: Compromising your credentials could affect any NOAA resources your identity has access to.
- Expecting complete restores: If admin actions break your instance, we will help in good faith, but often the best resolution is provisioning a fresh, blank instance.
Hardware-Level Control
You have the ability to control the machine type of your pam-ww, which determines the underlying hardware. This can be changed without affecting the contents of your pam-ww - instance just has to be off to modify machine type.
What we encourage you to do:
- Track your resource usage for processing jobs in task manager and (if using GPU) perfmon.
- If you determine that your software is throttling on CPU, RAM, disk, or GPU, please let the support team know of your issue. They will help verify if it is a hardware related performance issue.
- If the support team agrees they will usually recommend certain changes to the machine type or disk. The machine type can be changed manaully in the GCP console.
Note
Please keep the instance off when not in use, for instance at the end of your workday if you are done actively using it for the night. Leaving it on for long periods unnecessarily incurs unneeded cost. This is especially important if you are running a pam-ww with higher hardware allocations or GPU.
Updates
The pam-ww admin team occasionally adds features into the base image. These updates are entirely voluntary. If you want these new features, you should delete your VM and then request an upgrade. You will need to rebuild any customizations from a blank slate.
We will occasionally communicate occasional updates on new features to the community of pam-ww users.
Request an upgraded pam-ww
To upgrade:
- First check that you are indeed behind the latest pam-ww version. You can check the current version of your pam-ww by going to the homepage, clicking on the name of your pam-ww, and reviewing ‘Boot disk storage image’ listed in the Basic Information section.
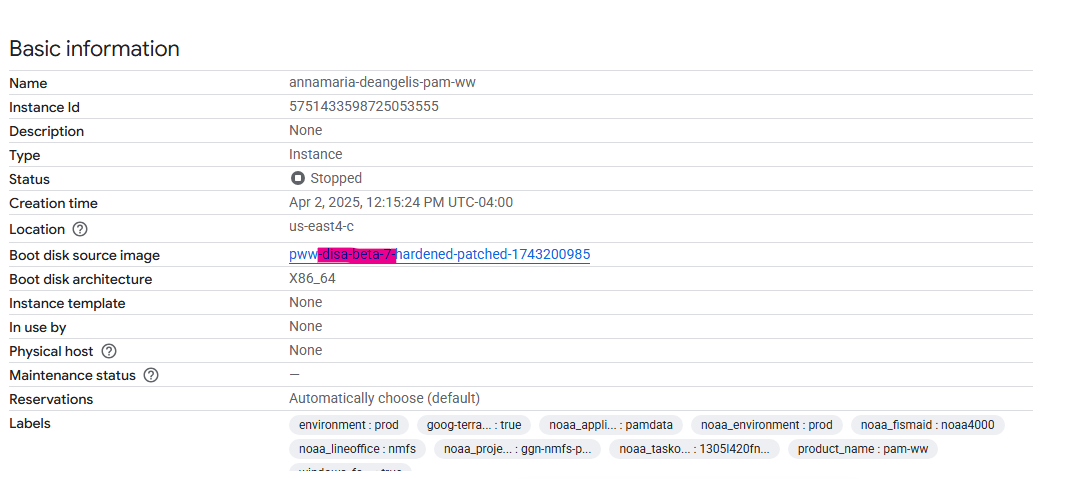
The text under the ‘image’ field indicates the current version of your pam-ww. The pam-ww image name is between the text “pww-disa” and “hardened…”, in this case, “beta-3”. To check whether there are more recent pam-ww versions and identify if the bug you are experiencing has been resolved in one of those versions, can cross reference your current version with pam-ww template change tracking document linked below. Both documents track the changes and are organized in consecutive order where the last entry represents the most recent available version.
Ensure all processing jobs are complete.
Move local C: drive files that are important to you and have not already been exported to cloud storage (fmc-working or pam-ww-tmp bucket, Google drive, etc).
Delete your current pam-ww instance by going to the homepage, clicking the three vertical dots associated with your instance and select ‘Delete’.
Submit a new issue here using the “Request an upgraded pam-ww” template, or if you don’t have access, use this form.
How to Get Help: Escalation Tiers
If you encounter challenges, please follow this escalation path:
- Community Chat: Reach out to the user community for quick troubleshooting and shared experiences.
- GitHub Issues / Smartsheet Bug Report: If the community cannot resolve the issue, formally submit an issue or a bug report.
Technical Advice for Data Processing
Configuring user mounts and read-ahead cache tool
Mounting with user permissions is required to have read access to buckets. There is a graphical tool for configuring these user mounts, and a companion read-head cache tool for pre-populating the cache. The read-ahead cache tool is useful for cases where a human needs to be involved paging through large data, as it decreases delays associated with on-the-fly downloads. User instructions are provided below and more detailed instructions available here. To see how user mounts and pre-fetching or caching data is used in an example analytical workflow, review this LFDCS protocol.
To use:
Prerequisite: If you have not set up the user mount tool for your pam-ww and have workstation beta-11 or older, follow these one-time instructions to update your mount tool.
- If you would like to access user mounts as your individual user (for instance, for workflows where you need to write to buckets, open up a cmd line and first authenticate with:
gcloud auth application-default loginWhen you authenticate, be sure to give GCP access as shown below for it to work correctly: 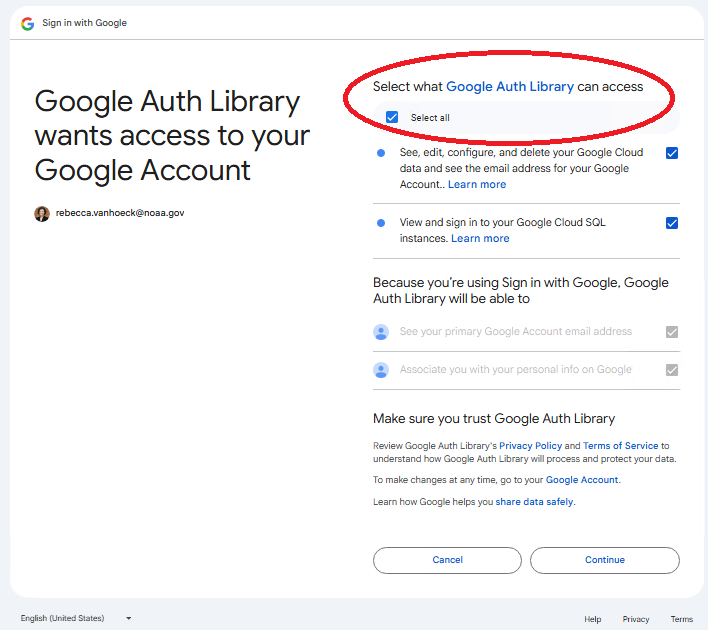
If you do not authenticate as your user with the above code, the pam-ww will use the built in permissions (may or may not work as expected, especially for buckets outside of ‘pamdata’ GCS project). This can be a useful intentional choice if you only want read only access.
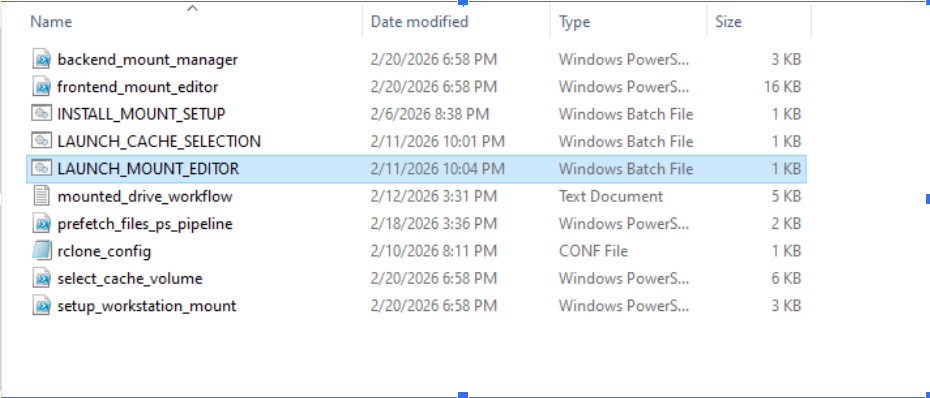
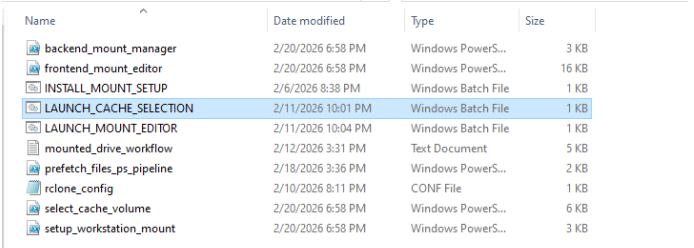
Open the directory on the desktop called ‘user_drive_mounts_config’. Double-click LAUNCH_MOUNT_EDITOR.bat.
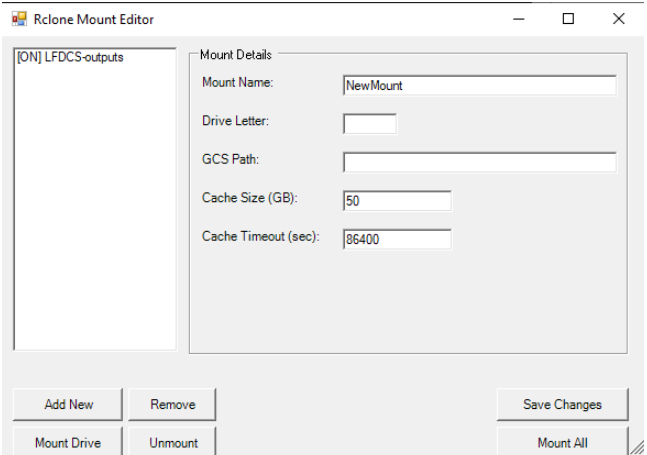
A GUI will be presented. From here, you can ADD, EDIT, REMOVE, MOUNT, or UNMOUNT drives. Remember that your specified cache size will fill up your C drive. Note that the specifying a cache size of 0 is not no cache, it is infinite cache! If caching is generally not needed a small cache (1) will not negatively impact performance much. To mount a cloud bucket fill provided GUI fields:
- Mount Name: User specified name for the mount (eg. pifsc-1 or soundfiles)
- Drive Letter: Any letter that is already assigned to a mount on your workstation
- GCS Path: Name of the bucket (eg. nefsc-1 or nmfs-collaborative)
- Cache Size: leave the default unless your workflow requires a larger cache
- Cache Timeout: leave the default unless your workflow requires a larger cache
- Pre-fetching data for fast access: If you are doing interactive work, “pre-fetch” the data to your local workstation cache first.
A GUI will open to select a folder for caching and a pre-fetch order. Click ‘Browse…’ to select the mounted drive. Note: Only ‘user’ mounts or custom Rclone mounts work with this tool.
See the following video for a guided walkthrough:
Using the built in Rclone for a custom mount
Mounts can run into performance issues. The default mounts and user mounts both make certain assumptions about the use case but will not be perfectly optimal for every use case. Rclone, the tool underpinning both the default and user mounts, luckily is extremely customizable software. Rclone has various optimizations (read / write / full) depending on the expected type of use, and there are some advanced features (for example “union” mounts, which connect to the storage bucket as read only but local changes are written to disk). If you’re willing to read the docs and try out custom mounts, you can aggressively design around mount related issues to your workflow.
Rclone’s documentation: https://rclone.org/commands/rclone_mount/
Example of a custom mount from the workstation. Rclone is not on PATH so you must use the absolute path. You can also create a custom .conf file anywhere on the system you have writes to and path to it instead of using the built in rclone.conf:
C:\Windows\rclone-v1.68.1-windows-amd64\rclone mount pamdata-gcs:nefsc-1-pab Z: -o UserName=pam_user --vfs-cache-mode writes --file-perms 0777 --dir-perms 0777 --network-mode --config=C:\Windows\pamdata\rclone.confDemo Instructions: working with mounts
Raven
- Open Raven Pro 1.6 using the desktop shortcut.
- Choose data of interest: Open “Mounted_Acoustic_Data” on the desktop, explore the buckets, and drag sound files into Raven. Select “Page Sound” -> “Open”.
- Recommended deployments if you do not have data:
- Cool humpback song: afsc-1/bottom_mounted/GA19_AU_BT01/12_2019 (Files: 191201_040000 - 191201_101000)
- NPRW gunshot song: afsc-1/bottom_mounted/BS12_AU_PM02-a/08_2012 (Files: 120805_032000 - 120805_081000)
- Very loud humpback: nefsc-1/bottom_mounted/NEFSC_GOM/NEFSC_GOM_202309_USTR02/6556_48kHz_UTC/ (File: 6556.231112050000)
- Sperm whales: nefsc-1/bottom_mounted/NEFSC_MA-RI/NEFSC_MA-RI_202205_NS05/NEFSC_MA-RI_202205_NS05_ST/6086_64kHz_UTC/ (File: 6086.221104023559)
- Explore acoustic data and share your screen to discuss findings!
R Studio & PAMscapes
- Create a personal folder in the pam-ww-tmp bucket named First_LastName.
- Download the R script from this folder and save it to your personal folder on the X: Drive.
- Mount the data bucket of interest using the command prompt:
{r, eval=F} C:-v1.68.1-windows-amd64mount pamdata-gcs:nefsc-1 Z: -o UserName=pam_user –vfs-cache-mode writes –file-perms 0777 –dir-perms 0777 –network-mode –config=C:.conf
- Open RStudio, open the script, and explore PAMscapes functionality.
Triton
- Mount the data bucket with the user mount tool to enable network mode access
- Open Triton via the desktop shortcut (this may take a few minutes).
- On the Triton Control tab, select “Remoras”, “Ship-Detector”, then “Evaluate detections”.
- Select the yellow folder with a ‘D’ and navigate to the mounted drive path (for example, Z:_VESSEL_FIXED_GOM_GOM_202105_MDR).
- Select the yellow folder with an ‘L’ to open the associated LTSA in the same folder.
- Input plot settings (Start Freq: 20 Hz, End Freq: 10000 Hz, Plot Length: 5 hr) and hit Plot.